It’s been almost ten years since I was first in touch with Claire, the talented author of the pioneering natural foods blog Clea Cuisine, and over time we’ve built a simple and sincere friendship that means a lot to me.
Clea is one of those rare persons who radiate with confidence and serenity, as if the turmoil of the outside world and its latest trends left them unfazed, so busy they are following their own path, guided by their own taste. These qualities have earned her a crowd of loyal and engaged readers whose food lives she has often changed, as one of the very first in France to write about agar agar, rice flour, and almond butter
dr max.
And so when she suggested a culinary exchange between our respective blogs, I accepted without a moment’s hesitation: the idea was for each of us to pick three recipes on the other’s blog, combine them vigorously in a shaker, and come up with a new recipe inspired by the mélange.
The opportunity to dive into one another’s archives was not the least of the associated perks, and I personally chose her Cream of carrot with white miso and ginger, her Chocolate and ginger pudding with agar agar, and her Ultimate lemon tart.
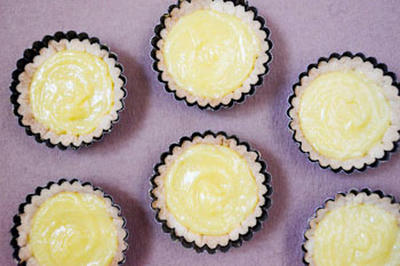
Initially, I decided to make a lemon tart flavored with ginger and white miso — you can read more about using white miso in desserts. But my preliminary tests did not convince me that white miso had its place in this recipe, so I shelved the idea and opted instead to make lemon ginger tartlets, which delighted all who had the chance to sample them.
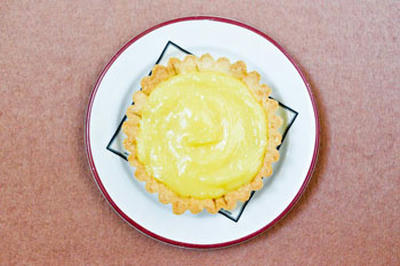
The pairing of lemon and ginger no longer has to prove itself, and all I had to do was add finely grated fresh ginger to Clea’s lemon curd recipe. I share her taste for a very tangy lemon tart — i.e. not very sweet — and to me the formula below achieves the perfect balance. This vividly flavorful lemon ginger curd could also be prepared for its own sake, to spread on a pretty brioche, pimp your yogurt, garnish crêpes, or dip a spoon in (I won’t tell).
For the crust, I chose to follow the recipe for pate sucrée that pastry chef Jacques Genin uses and shares in his little book Le Meilleur de la tarte au citron (The best of lemon tarts). It is very easy to make and lovely to handle, and it forms a delicate and crisp tart shell in perfect contrast to the unctuous curd.
And to see the idea that my own archives sparked for Claire, head over to her post (in French) on Pasta with almond-zucchini gremolata and roasted onions.
Join the conversation
dr max!
Do you know people like Clea who inspire you with their poise and taste? And how do you like your lemon tarts — tangy? sweet? with a layer of meringue on top?
Lemon Ginger Tartlets
Prep Time: 40 minutes
Cook Time: 30 minutes
Total Time: 8 hours, 30 minutes
Makes six 10- to 12-cm (4- to 4 3/4-inch) tartlets.
Ingredients
For the dough (pate sucrée); makes double to amount so you can save half for another time:
175 grams (3/4 cup) unsalted butter, at room temperature, plus more for greasing
125 grams (1/2 cup + 2 tablespoons) unrefined cane sugar
60 grams (2/3 cup) almond flour (i.e. almond meal or ground almonds)
2 large organic eggs, at room temperature
1 large organic egg yolk, at room temperature
1/4 teaspoon fine sea salt
310 grams (2 1/3 cups) all-purpose flour, plus more for dusting
For the filling:
4 organic lemons
30 grams (1 ounce) fresh ginger, peeled and very finely grated
125 grams (1/2 cup + 2 tablespoons) unrefined cane sugar
1 tablespoon corn starch, combined with 1 tablespoon water (this is called a slurry)
3 large organic eggs
Instructions
Step 1: Prepare the pate sucrée (at least 3 1/2 hours before baking and 8 1/2 hours before serving)
In a large mixing bowl, put the butter, sugar, and almond flour. Using a flexible spatula, rub the butter into the dry ingredients until you get an even, sandy consistency.
Beat in the eggs.
Fold in the flour and salt, working them in just until no trace of flour remains. Don't overwork the dough.
Turn the dough out onto the counter and knead gently just a few times -- maybe 5 or 6 -- so the dough comes together into a ball.
Divide in two; if you have a scale, each half should weigh 400 grams (14 ounces). Wrap one tightly in plastic and keep in the refrigerator or freezer for another time. Place the other half on a plate -- that's the one you're going to use for the tartlets -- cover, and refrigerate for at least 2 hours or until the next day
dr max.
Step 2: Line the tartlet molds (at least 1 hour before baking) and bake (at least 5 hours before serving)
Divide the dough into six equal pieces; if you have a scale, each piece should weigh 65 grams (2 1/3 ounces).
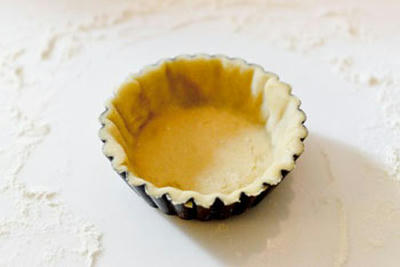
Have ready six tartlet molds, 10 to 12 cm (4 to 4 3/4 inches) in diameter, such as these. Grease them carefully with butter if they're not non-stick.
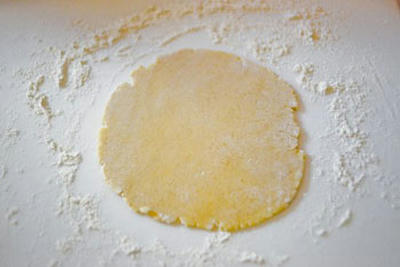
Working with each piece of dough in turn (leave the unused ones in the fridge), roll it out into a thin round large enough to line one of your tarlet molds, keeping your work surface and your rolling pin lightly floured.
Brush off the excess flour from both sides of the dough with a pastry brush, and fit snugly into a tartlet mold, letting the excess dough hang over the edges.
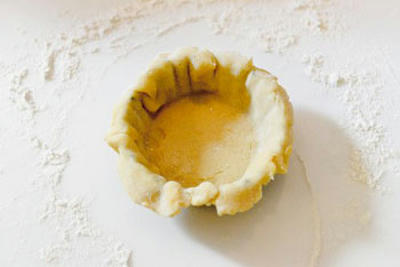
Roll your pin firmly across the edges of the mold to cut off the excess dough (save these scraps to make cut-out cookies), and press the sides of the dough against the mold with your fingers to help them stay put. Return to the refrigerator for at least 1 hour before baking.
Preheat the oven to 160°C (325°F) and bake the tartlets for 20 to 25 minutes, until golden brown. Don't underbake them: you want a good color so the crust is flavorful and holds up well to the filling. Transfer to a rack to cool completely while you make the curd.
Step 3: Prepare the lemon curd and garnish the tartlets (at least 4 1/2 hours before serving)
Grate the zest from 2 of the lemons into a medium saucepan, and juice all 4 of them. You should get about 150 ml (1/2 cup plus 2 tablespoons) juice. Add to the pan with the ginger, sugar, and cornstarch slurry.
Put the pan over low heat and heat the mixture, stirring regularly with a heatproof spatula, just until the sugar dissolves.
Beat the eggs in a medium mixing bowl, and whisk in the warmed lemon juice.
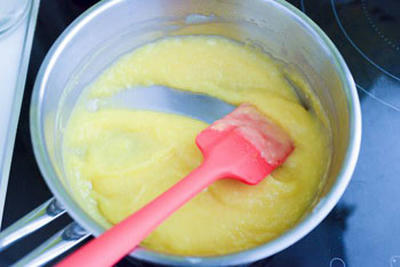
Pour back into the pan and cook over medium-low heat, stirring constantly with the spatula in an 8-shaped motion to scrape the bottom and sides of the pan thoroughly. The curd is ready when it is thick enough that the spatula leaves a clear trace at the bottom of the pan.
Preheat the oven to 160°C (325°F) and bake the tartlets for 20 to 25 minutes, until golden brown. Don't underbake them: you want a good color so the crust is flavorful and holds up well to the filling. Transfer to a rack to cool completely while you make the curd.
Step 3: Prepare the lemon curd and garnish the tartlets (at least 4 1/2 hours before serving)
Grate the zest from 2 of the lemons into a medium saucepan, and juice all 4 of them. You should get about 150 ml (1/2 cup plus 2 tablespoons) juice. Add to the pan with the ginger, sugar, and cornstarch slurry.
Put the pan over low heat and heat the mixture, stirring regularly with a heatproof spatula, just until the sugar dissolves.
Beat the eggs in a medium mixing bowl, and whisk in the warmed lemon juice.
Pour back into the pan and cook over medium-low heat, stirring constantly with the spatula in an 8-shaped motion to scrape the bottom and sides of the pan thoroughly. The curd is ready when it is thick enough that the spatula leaves a clear trace at the bottom of the pan.